How To Use the Peachtree Bridge/Tuner

The Peachtree Bridge® is a new and innovative system for headless guitars, integrating the tuner and bridge into one small package that resides within the body of the guitar. Due to its small size, the layout of the tuner buttons is different than what you are used to. It also is self locking, which simplifies stringing. It does require a bit of care in stringing it, although it is easy once you learn the process.
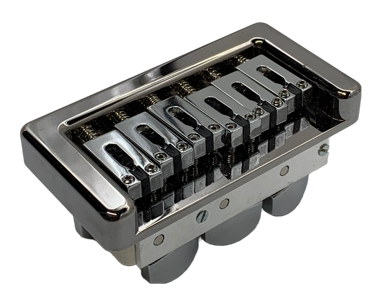
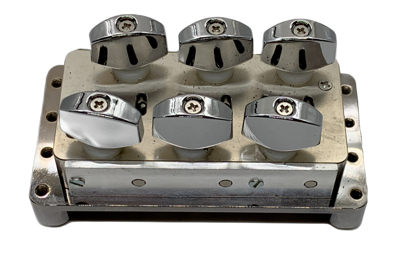

The tuner layout is shown here, with the lowest notes at the top. You can see the difference between the Standard Version and The Compact Version. The Standard Version has the string orientation placed in a more intuitive layout, with the top most top-most tuner aligned to the top-most string.
The Compact Version of the Peachtree Bridge results in an offset of the strings to make it so compact. This results in the E strings being set in from the end of the tuners. This allows for the tuner to be the absolute minimum size required, but takes a little practice to get used to. An easy to remove label is provided in the event you want to mark it on your guitar for awhile. (Note that the adhesive on the label is a Surface Safe® label from Avery, but you may not want to leave it on lacquered guitars for an extended period, as it could react to the finish).
Installing the Strings
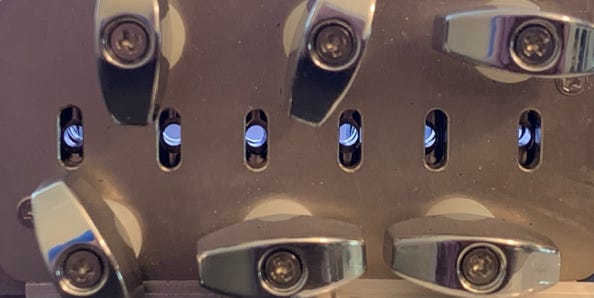
1 - The first step is to ensure the tuners are aligned so the strings can go through. Hold up the Trouper and look through the vision slots on the bottom of the tuner. If you cannot see light through the string holes, turn the tuner until you can.
a - If the tuner button is too stiff or too loose for you, adjust the button screw.
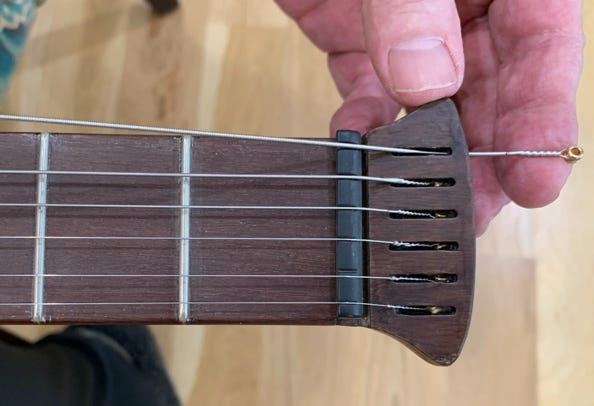
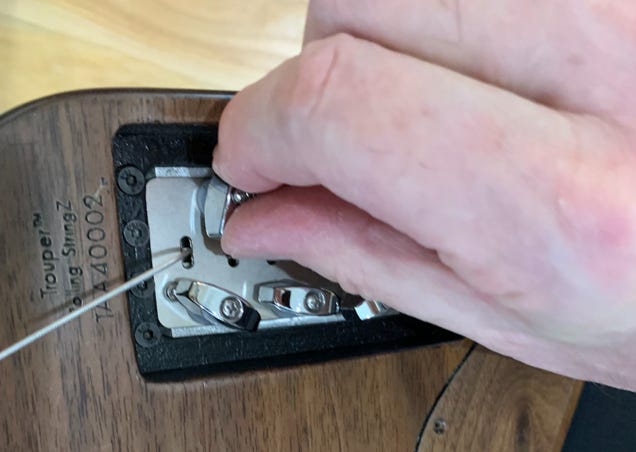
2 - Push the string through the opening in the headpiece, ensuring that the ball is placed securely in the slot.
3 - Push the string into the saddle and through the tuner hole, then pull it through the saddle loosely. Don't overtighten.
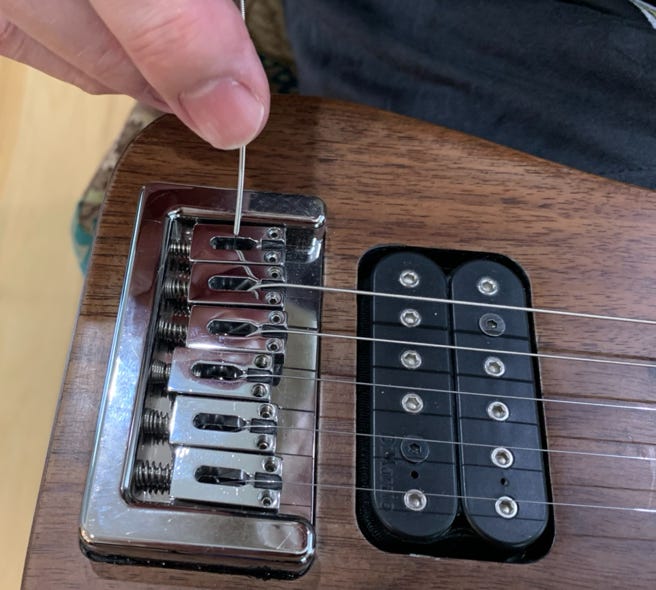
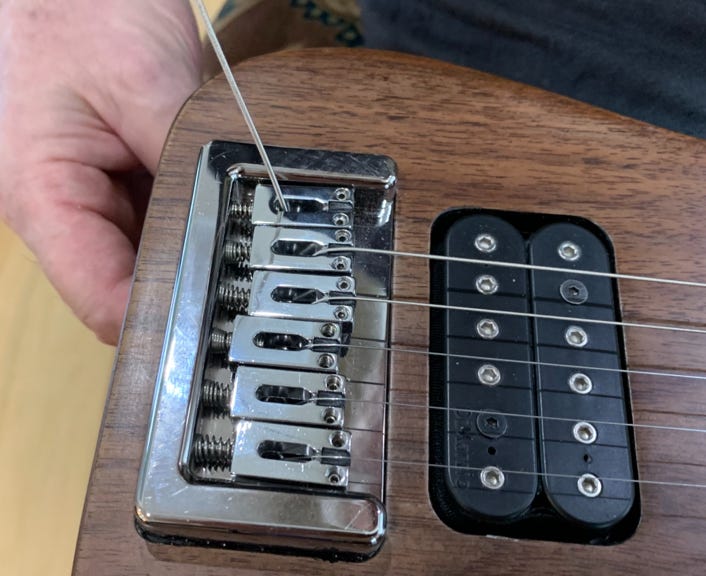
4 - Leave the string a little loose - about 3/4" above the rest of the strings and pickup. Use your finger as a guide. Don't overtighten. I find it makes the stringing a little easier to hold the extra string in a loop as I turn the tuner button.
a - This may take a little practice. If you pull the string too tight before tuning, the string may break. If it is too loose then removing the string will be difficult. You will want to turn the tuners about 12-15 full 360° turns to get it to pitch, once it is inserted. Since this is a 20:1 gear, that means the string should wrap about 3/4 of the way around the tuning post.
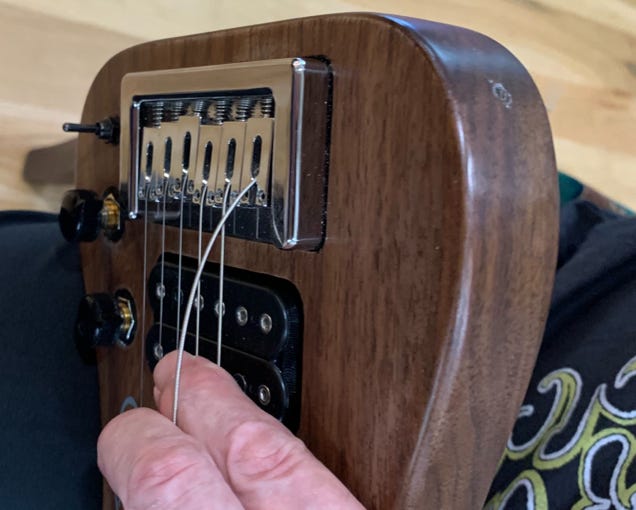
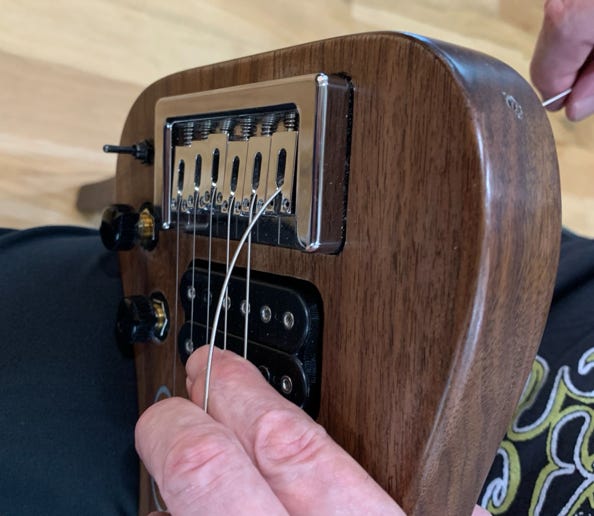
5 - Turn the tuner to tighten the string to pitch. I like to count the turns on the button, and you should feel the string getting very tight on your finger after about 6-7 full 360° turns of the button. Remove your finger and tune to pitch. It should take about 15 full 360° turns of the button to get to pitch.
a - You can turn the tuner whichever direction you want. I prefer using the "righty tighty, lefty loosey" rule, so I can remember which way I have turned it later on.
b - If the string breaks, you will want to grab the piece between the tuner buttons with a needle nose pliers and carefully turn the tuner back to it's original open position, while pulling on the string. This usually means that not enough slack was given when inserting the string.
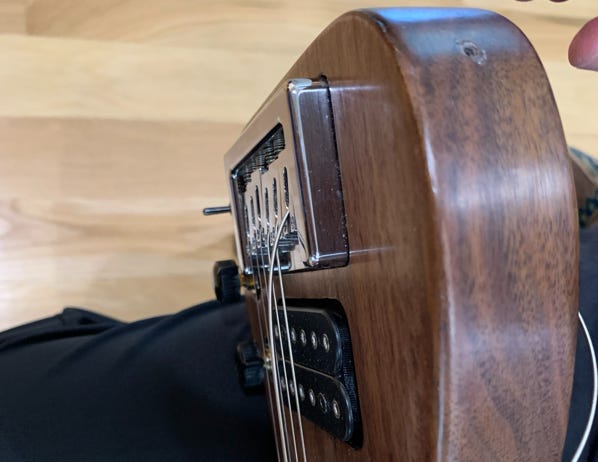
6 - Cut the string with the supplied tool or wire cutter. Leave about half an inch or so sticking out, you don't want to have the string completely inserted into the housing.
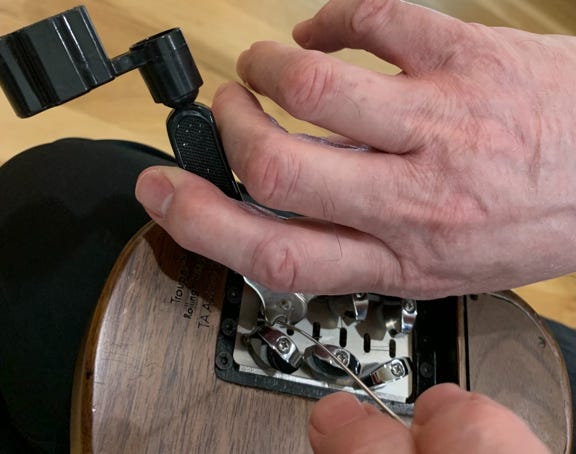

7 - Repeat the process with all the strings, stretch the strings as you would with any other guitar, retune to pitch and enjoy!
Removing the Strings
Removing the strings is usually pretty easy. Simply turn the tuner button in the opposite direction that you tightened it until you can see light through the slots in the housing, and pull the string out from the top. This is why it is good to count the number of turns you make installing the strings, because then you'll have an idea if you have gone too far. Sometimes, it may take a little effort to pull it out. This is normal, since the twisting of the string is what causes it to self-lock.
Sometimes the strings will get twisted around in the housing, especially if there was a little too much slack given when the string was installed, or if you have repeatedly loosened and retightened the strings. In this case, you will not be able to pull the string out no matter how hard you pull. In this case, take a pair of needle nose pliers and grip the string from the bottom (the tuner side) and pull the string back to straighten it out. Usually about a half an inch to an inch of the string will be pulled back. Make sure the holes are aligned, and that you didn't accidentally turn the tuner too far, then pull the string out from the top normally.
Rolling StringZ Guitars, Peachtree Bridge Woodworking and Deep Nuggets Radio are part of the Peachtree Bridge Enterprises, LLC Family
Like the travel guitars shown in this site? Then check us out at Rolling StringZ Guitars, for the most advanced premium travel guitar, as well as other new and exciting guitars as they are developed.
For the most eclectic music on the web, join us at the Greatest Radio Station at the End of the Universe! Deep Nuggets Radio!
All Specifications Subject to Change Without Notice
The Trouper® and Peachtree Bridge® and all associated products and applications
Covered under US Patent 11,074,893
Copyright © 2023 Peachtree Bridge Enterprises, LLC.
All rights reserved